Introduction 00:00
Post-processing also benefits from the React and R3F system, as it has gotten easier to implement but is also optimized in some ways.
In this lesson, we are going to learn how it differs from the post-processing techniques we’ve covered before, implement a bunch of effects, and even create our own effects.
The issue with post-processing 01:11
In the previous lessons, we’ve used post-processing by adding passes.
Those passes had their own code and were completing one or multiple renders in order to achieve the desired result.
Then the next pass would do the same, and again, and again.
Those passes all occurred independently and some of them were doing the same renders (depth renders, normal renders, etc.), which resulted in performance issues and limited the number of passes we could add before getting a frame rate drop.
The solution 03:02
And this is exactly what Post Processing is trying to resolve.
The various passes will be merged into the least number of passes possible. In fact, we don’t talk about passes anymore, but we talk about “effects”.
Those effects will be merged together into one or multiple passes (if needed) automatically while keeping the order in which we added them.
We can even choose the blending of each effect (more about that later).
And, as you might’ve guessed, we can use Post Processing in R3F with @react-three/postprocessing.
Setup 04:27
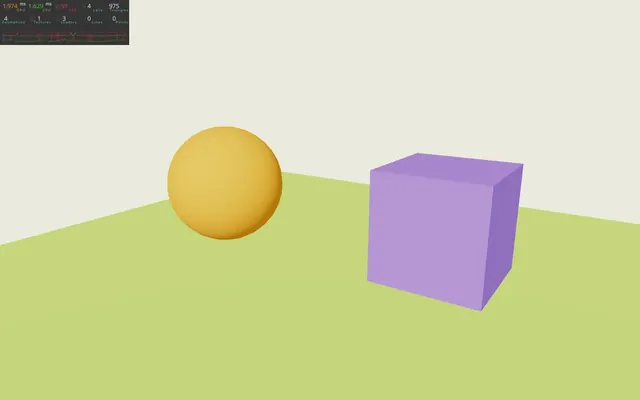
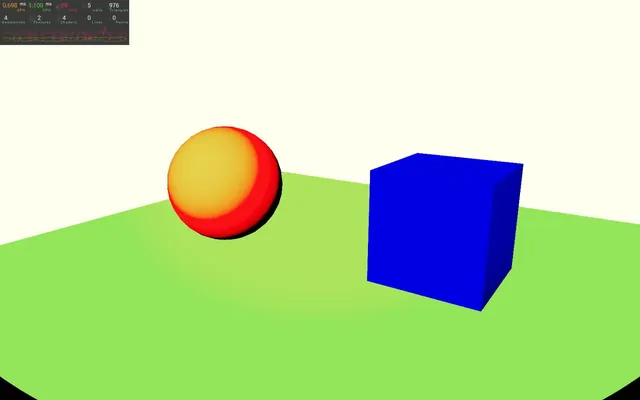
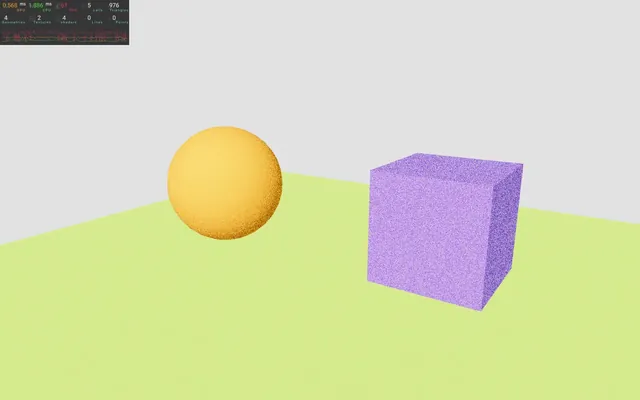
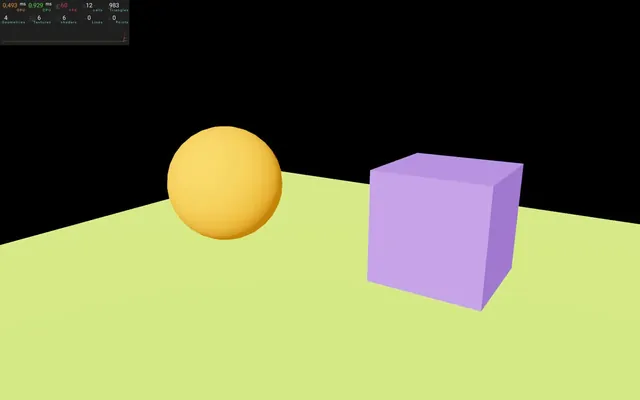
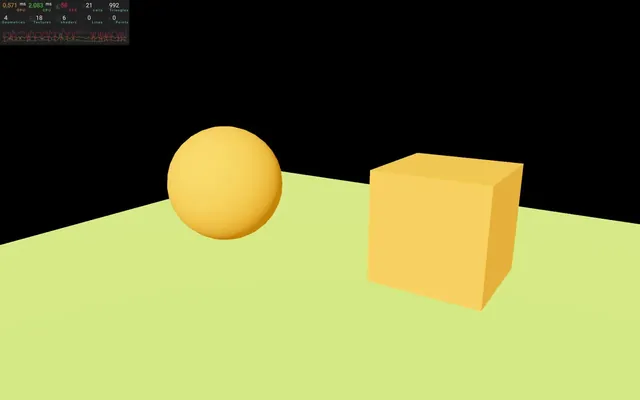
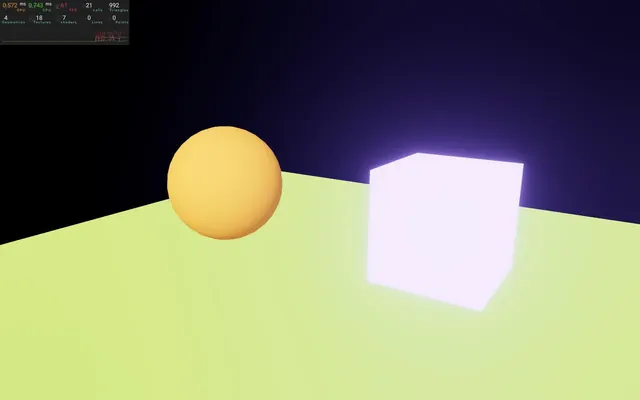
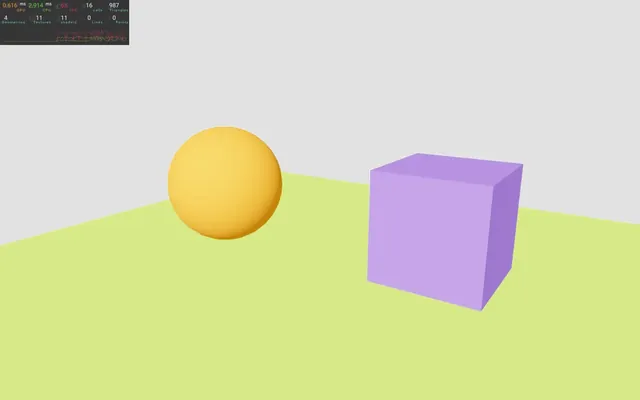
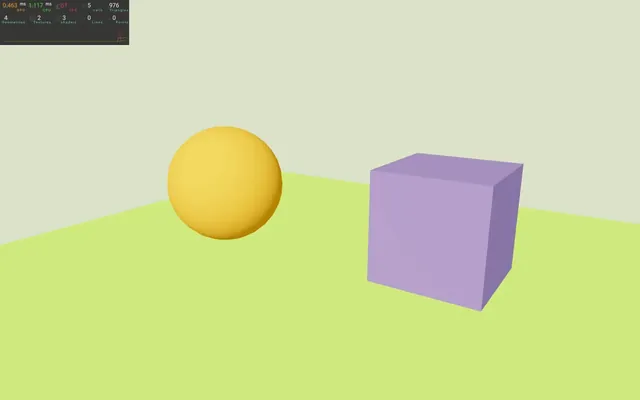
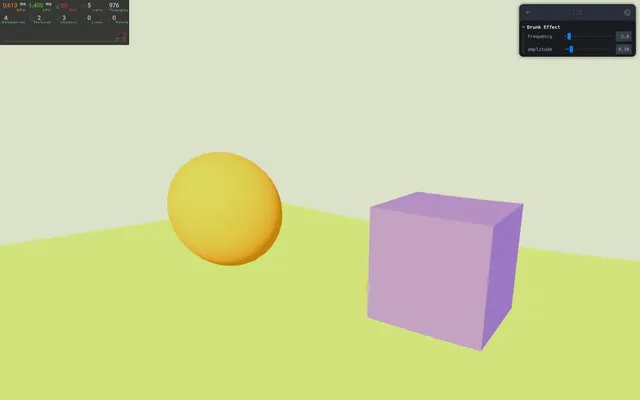
In the starter, we have the classic orange sphere, purple cube, and green floor.
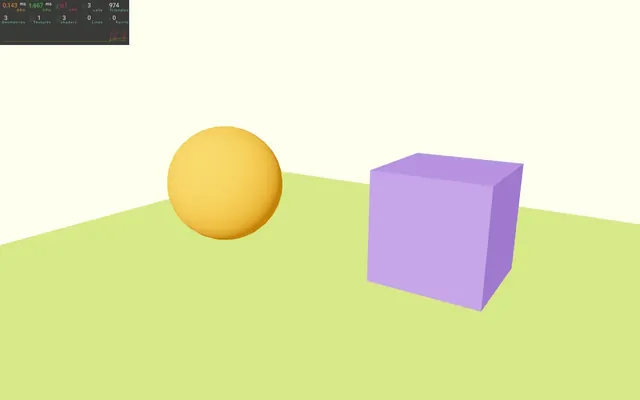
We also have a directional light source and an ambient light source.
The @react-three/drei dependency is already installed within the project and we are using the OrbitControls helper to be able to move the camera around.
We also have <Perf /> from r3f-perf in order to keep an eye on performance.
Implement 04:56
We need two dependencies, @react-three/postprocessing, and postprocessing.
But for now, the only one we need to install is @react-three/postprocessing since this dependency will also install postprocessing.
In the terminal, use npm install @react-three/postprocessing@2.16 (we force the versions to prevent surprises, you can ignore potential vulnerability warnings).
In Experience.jsx, import EffectComposer from @react-three/postprocessing:
import { EffectComposer } from '@react-three/postprocessing'Although it’s the same name as the EffectComposer we used in native Three.js, it’s not the same class.
Now, add it to the JSX:
export default function Experience()
{
    return <>

        <EffectComposer>
        </EffectComposer>

        {/* ... */}

    </>
}
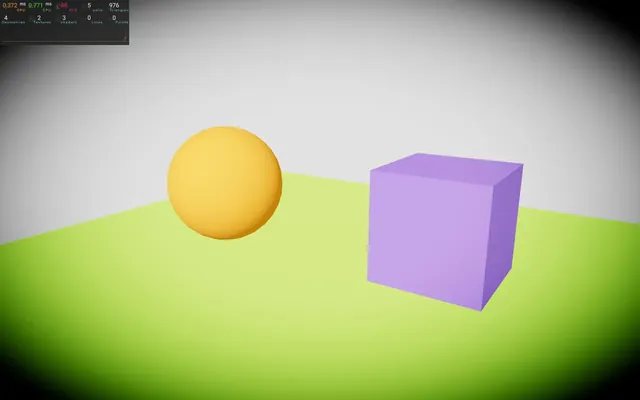
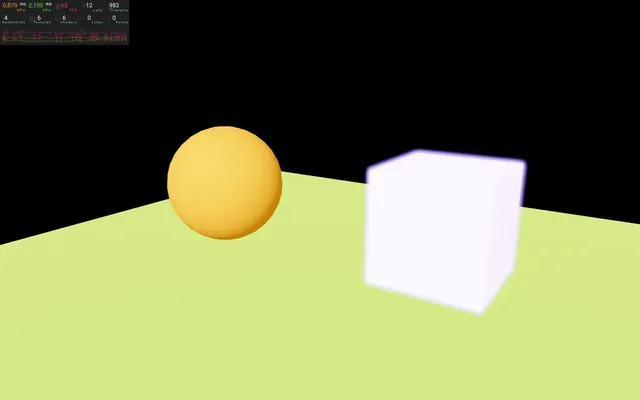
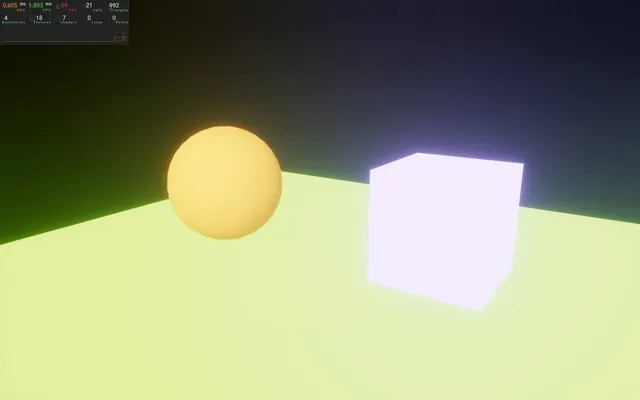
EffectComposer is now running, but the colors are now completely off.
This is due to the tone mapping being deactivated in the post-processing rendering process for more appropriate color management.
We can fix that by adding the tone mapping ourselves as an effect at the end of the <EffectComposer>.
Import ToneMapping from @react-three/postprocessing:
import { ToneMapping, EffectComposer } from '@react-three/postprocessing'Then, add <ToneMapping> inside <EffectComposer>:
<EffectComposer>
    <ToneMapping />
</EffectComposer>
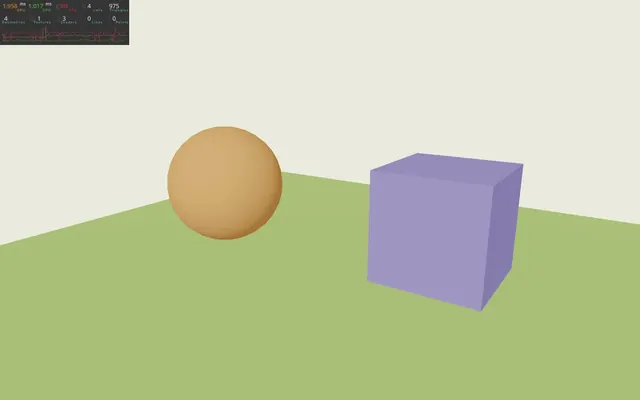
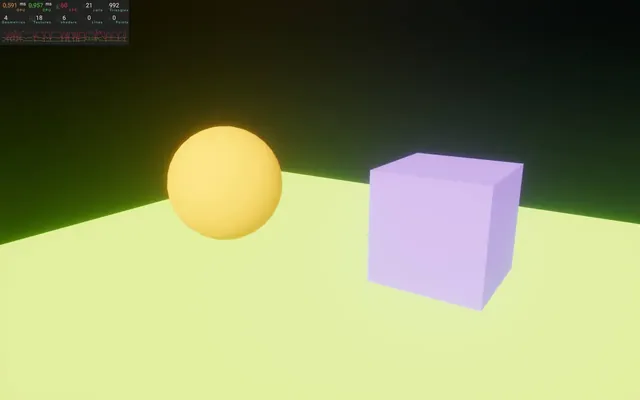
That’s better, but the picture looks gray-ish.
This is due to the default tone mapping applied by ToneMapping named AgX. AgX is a quite recent tone mapping which looks okay, but it’s not the default one used by R3F.
To change that, first we need to import the list from postprocessing. Yes, I’m talking about the original postprocessing library, not the React Three implementation.
Because we’ve added @react-three/postprocessing to the project, we can already import things from postprocessing directly, but it’s considered good practice to add it ourselves to the project so that we don’t have to rely on other dependencies.
In the terminal run npm install postprocessing@6.35 (we force the versions to prevent surprises, you can ignore potential vulnerability warnings).
If you get an error at this exact step, something about the dependency tree unable to be resolved, run npm install --force postprocessing@6.35 instead.
To get the list of blends, import available tone mappins from postprocessing, we need to import ToneMappingMode from postprocessing:
import { ToneMappingMode } from 'postprocessing'
console.log(ToneMappingMode)
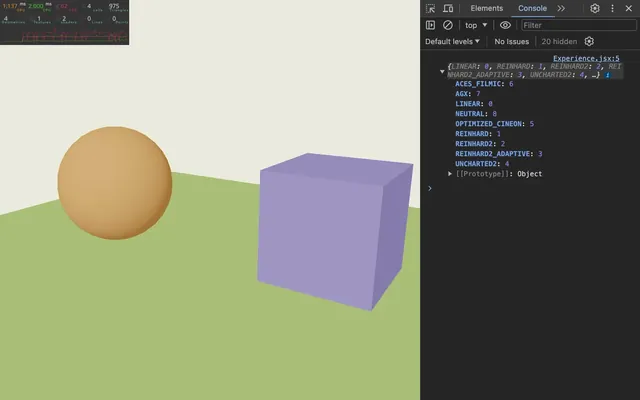
The one we want is ACES_FILMIC and we can apply it to the <ToneMapping> using the mode prop:
<EffectComposer>
    <ToneMapping mode={ ToneMappingMode.ACES_FILMIC } />
</EffectComposer>
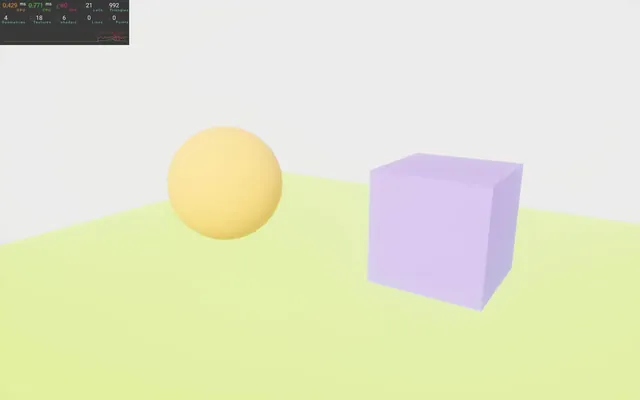
The color is back.
Remove the console.log(ToneMappingMode).
Note that we don’t even need to add the first render, since Post Processing will take care of that.
Be careful, in the following parts, as you might have to reload the page after tweaking or adding an effect.
Multisampling
We can assign various attributes to the <EffectComposer>, but the most interesting one is multisample.
As discussed in the previous lessons, multi-sampling is used to prevent the aliasing effect (the little stairs on the edges of geometries).
By default, its value is at 8 and we can lower it down to 0 in order to disable it completely.
<EffectComposer multisampling={ 0 }>
    <ToneMapping mode={ ToneMappingMode.ACES_FILMIC } />
</EffectComposer>

(Note that you will probably not see a big difference in the screenshot above because of the image compression)
Performance should be better when disabling multi-sampling, but we don’t really care about that in this lesson, so let’s remove it and keep the default value:
<EffectComposer>
    <ToneMapping mode={ ToneMappingMode.ACES_FILMIC } />
</EffectComposer>
Finding effects and how to implement them 16:17
In the following part of the lesson, we are going to test a bunch of effects for the sake of learning.
We are going to set very specific values without going too much into detail because it would take ages and be boring.
But you should roam the documentation in order to discover the various effects, test them, and see how they work.
Unfortunately, the documentation (though useful) is a bit messy and spread across react-postprocessing and Post Processing, which means you’ll have to dig a little in order to find what you are looking for.
Here are the links that you might need.
Post Processing:
- The repository: https://github.com/pmndrs/postprocessing
- The documentation (generated from the code): https://pmndrs.github.io/postprocessing/public/docs/
- A demo page (you can change the effect within the debug UI): https://pmndrs.github.io/postprocessing/public/demo/
React-postprocessing:
- The repository: https://github.com/pmndrs/reactpostprocessing
- The list of effects implemented from postprocessing to React postprocessing: https://github.com/pmndrs/postprocessing#included-effects
- The documentation (very similar to the repo, but more user-friendly): https://docs.pmnd.rs/react-postprocessing/introduction
Vignette effect 21:10
Let’s start with a very common effect, the Vignette effect.
Vignette will make the corners of the render a little darker.
Import Vignette from @react-three/postprocessing:
import { Vignette, EffectComposer } from '@react-three/postprocessing'Then, add it to <EffectComposer>:
<EffectComposer>
    <ToneMapping mode={ ToneMappingMode.ACES_FILMIC } />
    <Vignette />
</EffectComposer>
Make sure to keep the <ToneMapping> as the very first effect of <EffectComposer>.
Parameters of the effect are exposed as attributes.
The following example with the Vignette effect demonstrates how we can change the offset and the darkness:
<Vignette
    offset={ 0.3 }
    darkness={ 0.9 }
/>
Blending 22:38
There is a special attribute named blendFunction available within Vignette but also with every other effect to come.
blendFunction works a bit like the blending you can find in image editing software (like Photoshop). It’s how the color of what we are drawing merges with what’s behind it.
The default blending is “normal” and it simply draws the effect on top of the previous one.
We can change it, but in order to do so, we need to get the list of blending from postprocessing.
Since imported ToneMappingMode from postprocessing, we can already import BlendFunction the same way:
import { BlendFunction, ToneMappingMode } from 'postprocessing'
console.log(BlendFunction)
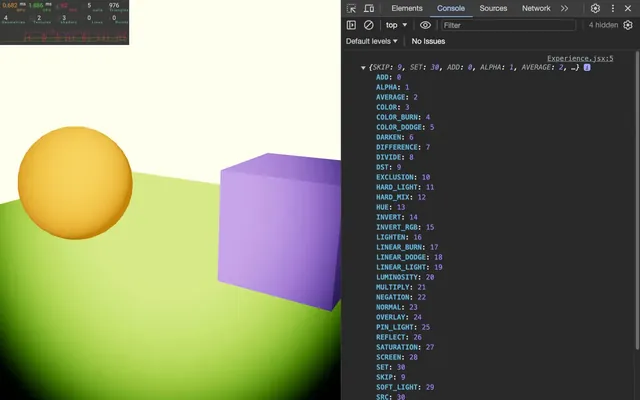
As you can see, there are a lot of them.
Finding the right one is hard, but with a debug UI it’s much easier and you can go through all of them with just a few clicks.
We are not going to do that in the lesson, but feel free to add Leva to the project.
Still, we might as well test one out of curiosity:
<Vignette
    offset={ 0.3 }
    darkness={ 0.9 }
    blendFunction={ BlendFunction.COLOR_BURN }
/>
Quite ugly, isn’t it?
We can reinsert BlendFunction.NORMAL or remove it since it’s the default one:
<Vignette
    offset={ 0.3 }
    darkness={ 0.9 }
    blendFunction={ BlendFunction.NORMAL }
/>

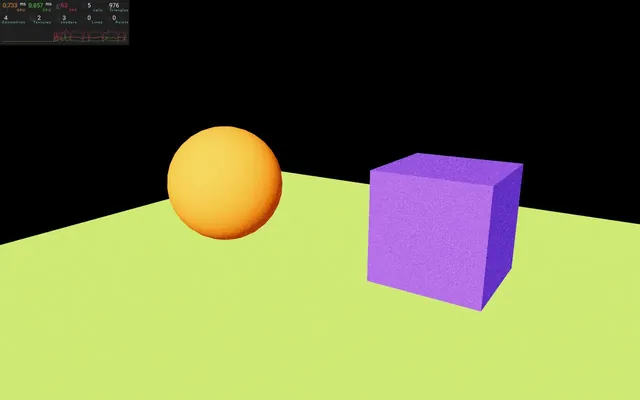
Background bug 26:21
You might have noticed that the vignette effect doesn’t work on the background.
It’s because the render is transparent by default and there is nothing to render there.
We can fix that by adding a color like in the previous lessons:
export default function Experience()
{
    return <>

        <color args={ [ '#ffffff' ] } attach="background" />

        {/* ... */}

		<>
}
Glitch effect 27:55
Let’s continue our discovery of effects with the Glitch effect.
The Glitch effect will make the screen glitch randomly like in hack scenes in movies.
Be careful with the following content if you are sensitive to flashes and fast movements.
First, import Glitch from @react-three/postprocessing:
import { Glitch, ToneMapping, Vignette, EffectComposer } from '@react-three/postprocessing'Then, comment <Vignette> and add <Glitch> to <EffectComposer>:
<EffectComposer>
    {/* ... */}
    <Glitch />
</EffectComposer>
And again, we can play with its attributes:
<Glitch
    delay={ [ 0.5, 1 ] }
    duration={ [ 0.1, 0.3 ] }
    strength={ [ 0.2, 0.4 ] }
/>
One of those attributes is the mode and the values are stored in the GlitchMode object, which is available in postprocessing.
Now, import GlitchMode from postprocessing:
import { GlitchMode, BlendFunction, ToneMappingMode } from 'postprocessing'
console.log(GlitchMode)
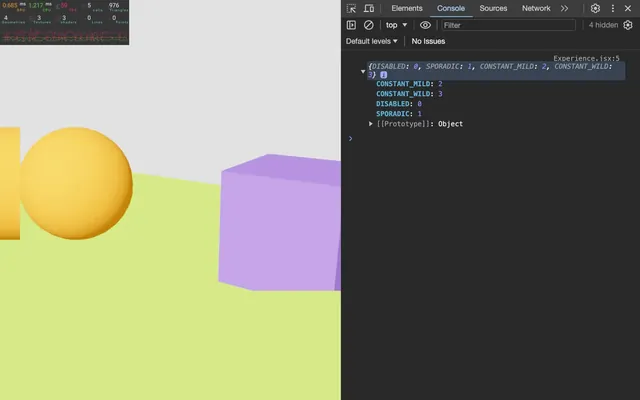
And finally, we can choose one of those modes:
<Glitch
    delay={ [ 0.5, 1 ] }
    duration={ [ 0.1, 0.3 ] }
    strength={ [ 0.2, 0.4 ] }
    mode={ GlitchMode.CONSTANT_MILD }
/>
Noise effect 33:14
Let’s continue with the Noise effect that will add some parasites to the screen.
Import Noise from @react-three/postprocessing:
import { Noise, Glitch, ToneMapping, Vignette, EffectComposer } from '@react-three/postprocessing'Then, comment<Glitch> and add <Noise> to <EffectComposer>:
<EffectComposer>
    {/* ... */}
    <Noise />
</EffectComposer>
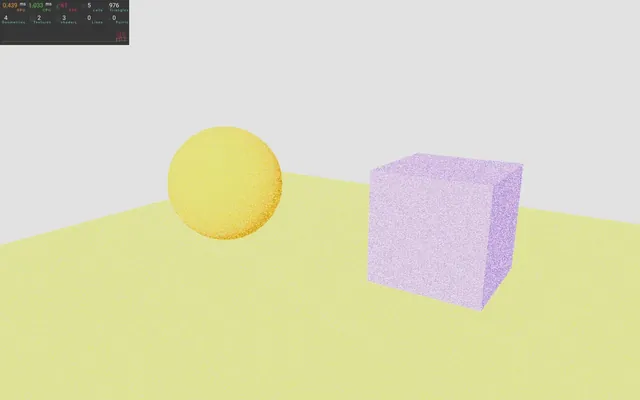
The default result doesn’t look really appealing, but with the right tweaking, we can achieve a better result.
First, we can change the blendFunction.
Remember that all effects can have a different blending and that we’ve already imported BlendFunction from postprocessing.
Change blendFunction to BlendFunction.SOFT_LIGHT:
<Noise
    blendFunction={ BlendFunction.SOFT_LIGHT }
/>
It’s up to you to find the blending you prefer, but here’s a good list:
BlendFunction.OVERLAYBlendFunction.SCREENBlendFunction.SOFT_LIGHTBlendFunction.AVERAGE
Another attribute that might help you get the best result is premultiply:
<Noise
    premultiply
    blendFunction={ BlendFunction.SOFT_LIGHT }
/>
premultiply will multiply the noise with the input color before applying the blending.
It usually results in a darker render but it blends better with the image.
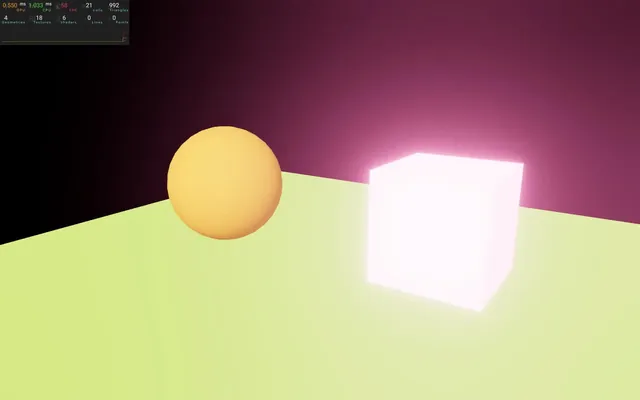
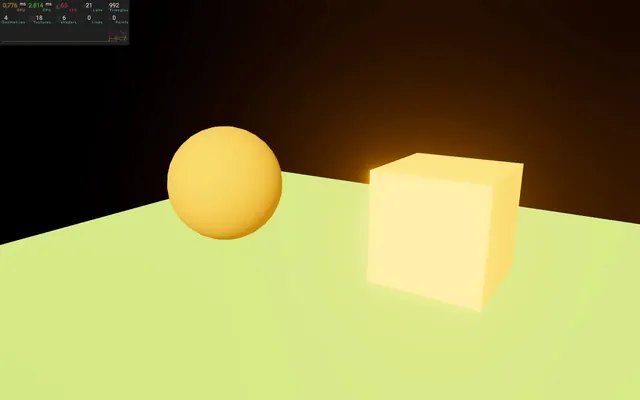
Bloom effect 37:05
Next on the list is the Bloom effect, which will make our scene glow.
And since we are going to make our objects glow, it’ll be much better to test with a darker background.
Change the <color> value to #000000 :
<color args={ [ '#000000' ] } attach="background" />
Import Bloom from @react-three/postprocessing:
import { Bloom, Noise, Glitch, ToneMapping, Vignette, EffectComposer } from '@react-three/postprocessing'Comment <Noise> and add <Bloom> to <EffectComposer>:
<EffectComposer>
    {/* ... */}
    <Bloom />
</EffectComposer>
The default Bloom tends to make things glow too easily.
We can fix that by increasing the threshold above which things start to glow using the luminanceThreshold:
<Bloom luminanceThreshold={ 1.1 } />
Now, we need to find a way to push the colors of the objects we want to glow above that 1.1 threshold.
There are multiple solutions to do that, but first, we must fix a limitation.
Instead of using a literal color ("mediumpurple") we are going to provide an array containing the red, green, and blue values but not restrain ourselves to a 0 to 1 range:
<meshStandardMaterial color={ [ 1.5, 1, 4 ] } />
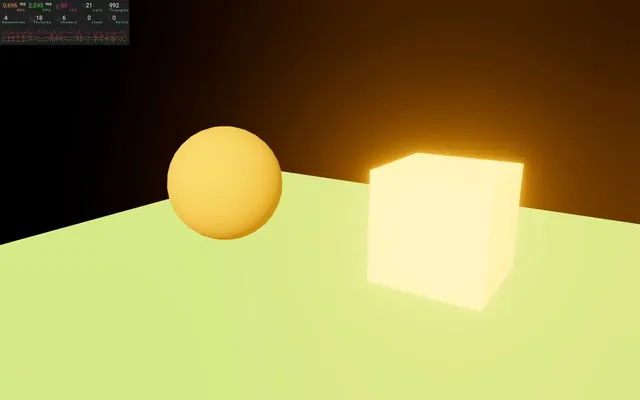
It’s working, but it’s a bit disappointing. Shouldn’t an object so bright create a large glow almost blinding us as if we were looking at the Sun?
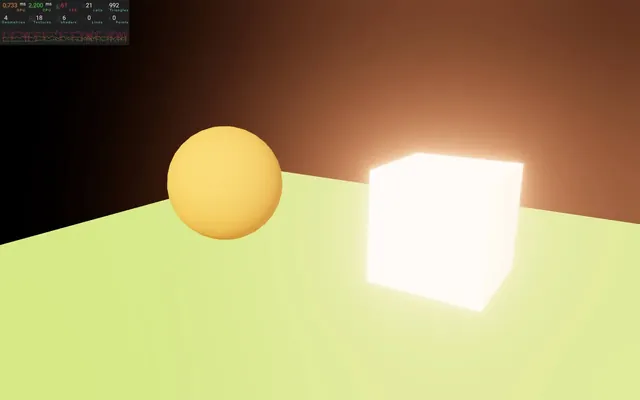
Yes, it should! and we can achieve such a result by adding the mipmapBlur attribute to <Bloom>:
<Bloom luminanceThreshold={ 1.1 } mipmapBlur />Much better.
Without going into detail, the mipmap blur will use the same mipmapping technique we talked about when learning about textures.
Smaller resolutions of the render will be combined into a bloom texture which is then added to the initial render. It looks great without sacrificing performance.
You can now play with the color channels:
<meshStandardMaterial color={ [ 4, 1, 2 ] } />
<meshStandardMaterial color={ [ 5, 2, 1 ] } />
There are other ways to make our material glow.
As an example, let’s get back to an "orange" material:
<meshStandardMaterial color="orange" />
Now add an emissive attribute also with the "orange" value (it doesn’t have to be the same color but it makes sense that an orange object gives off an orange glow):
<meshStandardMaterial color="orange" emissive="orange" />
Right, we can now control how strong the emissive is within the emissiveIntensity attribute:
<meshStandardMaterial color="orange" emissive="orange" emissiveIntensity={ 2 } />
And if you want the inside of the cube to look brighter, you can always change its color to white:
<meshStandardMaterial color="#ffffff" emissive="orange" emissiveIntensity={ 2 } />
If you want a uniform emissive, you can switch to a <meshBasicMaterial>, but you won’t be able to use the emissive and emissiveIntensity and you’ll have to set the color attribute with channel values that go above 1:
<mesh castShadow position-x={ 2 } scale={ 1.5 }>
    <boxGeometry />
    <meshBasicMaterial color={ [ 1.5, 1, 4 ] } />
</mesh>
You can also control the general intensity of the bloom with the intensity attribute on <Bloom> (default 1):
<Bloom
    luminanceThreshold={ 1.1 }
    mipmapBlur
    intensity={ 0.5 }
/>
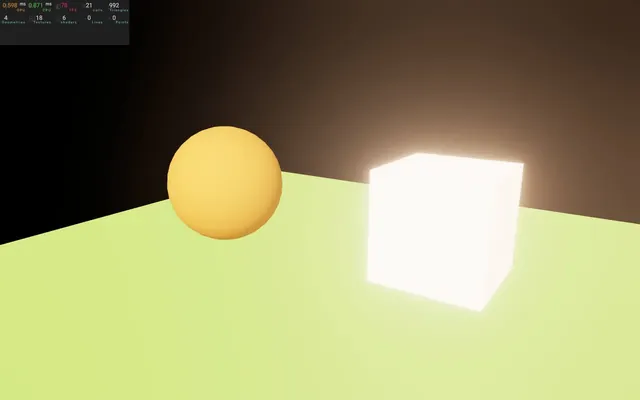
Then, define the threshold above which materials start to glow with luminanceThreshold (default 0.9):
<Bloom
    mipmapBlur
    intensity={ 0.5 }
    luminanceThreshold={ 0 }
/>
And now everything glows…
Bloom is one of the coolest effects you can add to an experience, which is why we spent some time covering it, but don’t be like me and try to be subtle when you add this effect.
Let’s revert the material of the cube to a <meshStandardMaterial> with a mediumpurple color:
<mesh castShadow position-x={ 2 } scale={ 1.5 }>
    <boxGeometry />
    <meshStandardMaterial color="mediumpurple" />
</mesh>
And change the background color to #ffffff in the <color>:
<color args={ [ '#ffffff' ] } attach="background" />
DepthOfField effect 52:57
The next effect is the DepthOfField effect.
This effect will blur what’s closer or farther from a set distance.
First, import DepthOfField from @react-three/postprocessing:
import { DepthOfField, Bloom, Noise, Glitch, ToneMapping, Vignette, EffectComposer } from '@react-three/postprocessing'Comment <Bloom> and add <DepthOfField> to <EffectComposer>:
<EffectComposer>
    {/* ... */}
    <DepthOfField />
</EffectComposer>
Again, the out-of-the-box result isn’t very convincing, but with the right attributes, we can obtain a better result.
The 3 main attributes that will help us are:
focusDistance: At which distance should the image be sharpfocalLength: The distance to travel from thefocusDistancebefore reaching the maximum blurbokehScale: The blur radius
But here’s the trick:
The values I’ve just mentioned are in normalized space (from 0 to 1) according to the camera near and far.
It’s not an absolute distance and we might need to do some math or tweak the values in order to get a better result.
To gain some time, I’ve already found good values, but feel free to tweak them:
<DepthOfField
    focusDistance={ 0.025 }
    focalLength={ 0.025 }
    bokehScale={ 6 }
/>
Performance 58:40
Out of curiosity, you can activate all the passes together (be careful with the Glitch effect if you are sensitive to flashes and fast movements):
<EffectComposer>
    <ToneMapping mode={ ToneMappingMode.ACES_FILMIC } />
    <Vignette
        offset={ 0.3 }
        darkness={ 0.9 }
        blendFunction={ BlendFunction.NORMAL }
    />
    <Glitch
        delay={ [ 0.5, 1 ] }
        duration={ [ 0.1, 0.3 ] }
        strength={ [ 0.2, 0.4 ] }
        mode={ GlitchMode.CONSTANT_MILD }
    />
    <Noise
        premultiply
        blendFunction={ BlendFunction.SOFT_LIGHT }
    />
    <Bloom
        mipmapBlur
        intensity={ 0.5 }
        luminanceThreshold={ 0 }
    />
    <DepthOfField
        focusDistance={ 0.025 }
        focalLength={ 0.025 }
        bokehScale={ 6 }
    />
</EffectComposer>
Although it varies depending on your computer, the pixel ratio, and the various settings of the effects you’ve applied, the frame rate is still fairly reasonable.
Post Processing ensures the lowest number of passes possible and combines the effects into one shader.
Let’s comment all those effects but not the <ToneMapping />:
<EffectComposer>
    <ToneMapping mode={ ToneMappingMode.ACES_FILMIC } />
    {/* <Vignette
        offset={ 0.3 }
        darkness={ 0.9 }
        blendFunction={ BlendFunction.NORMAL }
    />
    <Glitch
        delay={ [ 0.5, 1 ] }
        duration={ [ 0.1, 0.3 ] }
        strength={ [ 0.2, 0.4 ] }
        mode={ GlitchMode.CONSTANT_MILD }
    />
    <Noise
        premultiply
        blendFunction={ BlendFunction.SOFT_LIGHT }
    />
    <Bloom
        mipmapBlur
        intensity={ 0.5 }
        luminanceThreshold={ 0 }
    />
    <DepthOfField
        focusDistance={ 0.025 }
        focalLength={ 0.025 }
        bokehScale={ 6 }
    /> */}
</EffectComposer>

Custom effects 01:00:16
But what if we want to add our own effect?
This is where things get a little complicated. Because we have multiple levels of abstraction, we need to create the effect for Post Processing and then make it available in R3F.
In addition, because Post Processing is merging the effects into one shader, we need to follow very specific rules. But once we have a template and understand how it works, we can reuse it easily.
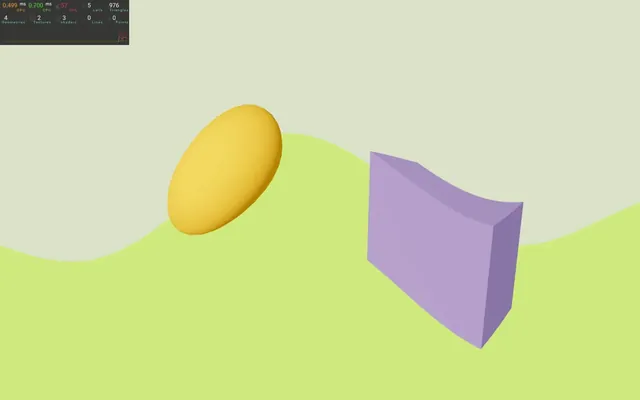
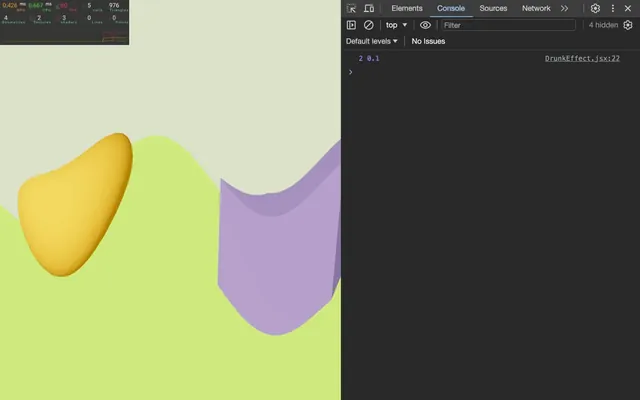
We are going to create a Drunk effect that will make the screen wiggle like in the game Sea of Thieves and add a green tint to it.
This effect is very simple, but should cover most of the custom effects you would want to build.
Here are two links on how to build custom effects for both React-postprocessing and Post Processing:
- Post Processing custom effect: https://github.com/pmndrs/postprocessing/wiki/Custom-Effects
- React-postprocessing custom effect: https://github.com/pmndrs/react-postprocessing/blob/master/api.md#custom-effects
We are going to put the files in the /src/ folder and write the shader inside the JavaScript, but for a more complex project, you should organize a bit more and at least create a separate folder for effects.
Creating basic effect
First, let’s create a very simple effect that does nothing.
In /src/, create a DrunkEffect.jsx file.
In this file create DrunkEffect class and export it as default:
export default class DrunkEffect
{
    constructor()
    {

    }
}
We need to extend the Effect class from postprocessing in order to implement most of what the effect needs.
Import Effect from postprocessing and extend your class with it:
import { Effect } from 'postprocessing'

export default class DrunkEffect extends Effect
{
    constructor()
    {

    }
}
Basic shader
Before writing things in the constructor, we need a very simple fragment shader.
Remember that postprocessing will take our shader and merge it with the other effect shaders.
Our shader can be implemented in a function that must be named mainImage, return void, and have the following very specific parameters:
void mainImage(const in vec4 inputColor, const in vec2 uv, out vec4 outputColor)
{

}
Omitting one of those parameters or changing them will result in a bug.
Let’s put it in a fragmentShader variable right before the class:
const fragmentShader = /* glsl */`
    void mainImage(const in vec4 inputColor, const in vec2 uv, out vec4 outputColor)
    {

    }
`

// ...
As you can see, we’ve added /* glsl */ in order to have the syntax highlighting. It does require you to install the VSCode extension called es6-string-html.
We could have added it in different files, but since the shader will be quite small, let’s keep it there.
You might have noticed that the parameters are slightly different from what we are used to writing in shaders.
It’s because we are using the WebGL 2 syntax where we can specify more information associated with each parameter:
constmeans that the parameter is not writable.inmeans that it’s a copy of the actual variable and changing it won’t affect the initial variable sent when calling the function.outmeans that changing this value will change the variable sent when calling the function.
It prevents us from making mistakes but also gives us a hint about what variables we need to change:
inputColorcontains the current color for that pixel which is defined by the previous effects.uvcontains the render coordinates (from0,0at the bottom left corner to1,1in the top right corner).outputColoris what we need to change in order to apply the effect.
For now, and because it was a lot of information, let’s assign the uv to the outputColor and fill the other values with 1.0:
const fragmentShader = /* glsl */`
    void mainImage(const in vec4 inputColor, const in vec2 uv, out vec4 outputColor)
    {
        outputColor = vec4(uv, 1.0, 1.0);
    }
`
Supposing we didn’t make any mistake, once the effect works, we should see the purple UV gradient that we’ve seen in previous lessons when displaying UV coordinates.
Now that we have our shader, we can finish the constructor.
First, we need to call super():
export default class DrunkEffect extends Effect
{
    constructor()
    {
        super()
    }
}
Calling super() in the constructor of a class that extends another class, is like calling constructor of that parent class.
As a side note, if you call super() in a function, it has to be the first instruction of the function.
To make the effect work, we need to pass three parameters to super():
- The name of the effect (we can choose whatever we want);
- The fragment shader that we wrote earlier;
- Some options in an object that we will keep empty for now.
export default class DrunkEffect extends Effect
{
    constructor()
    {
        super(
            'DrunkEffect',
            fragmentShader,
            {

            }
        )
    }
}
React-postprocessing implementation
Our minimalist Post Processing effect is ready.
Now, we need to implement it in react-postprocessing.
In /src/, create a Drunk.jsx file. In this file, we are going to create and export a component.
First, create a Drunk function and export it as default:
export default function Drunk()
{

}
Then, just to make sure that our component has been written properly, let’s put a <mesh> in it:
export default function Drunk()
{
    return <mesh>
        <boxGeometry />
    </mesh>
}
Now, in Experience, import the Drunk component:
import Drunk from './Drunk.jsx'Finally, add it to the <EffectComposer>:
<EffectComposer>
    {/* ... */}
    <Drunk />
</EffectComposer>
As you can see, we have our <mesh> showing up in the middle of the scene.
Obviously, we want our effect and not a mesh, but at least we know that our component works.
What we need to do now, is import the actual effect, instantiate it in the component, and return it.
In /src/Drunk.jsx, import DrunkEffect:
import DrunkEffect from './DrunkEffect.jsx'Instantiate it in the function:
export default function Drunk()
{
    const effect = new DrunkEffect()

    // ...
}
Instead of returning a <mesh>, return a <primitive> with the object attribute containing the effect (you might need to reload):
export default function Drunk()
{
    const effect = new DrunkEffect()

    return <primitive object={ effect } />
}

Unfortunately, we are far from done since it doesn’t look like what a drunk person would experience.
Props
Currently, our effect isn’t doing anything, but once it’s doing the drunk effect, we want that effect to be tweakable using attributes (like for the previous effects we tested).
The screen is going to wiggle with a sinus function and we want to be able to change its frequency and amplitude.
First, add a frequency attribute to 2 and an amplitude attribute to 0.1 on the <Drunk>:
<Drunk
    frequency={ 2 }
    amplitude={ 0.1 }
/>
In Drunk.jsx, to retrieve those attributes, we can add a props parameter to the Drunk function and forward it to the DrunkEffect:
export default function Drunk(props)
{
    console.log(props)
    const effect = new DrunkEffect(props)

    // ...
}
In DrunkEffect.jsx, we can retrieve the props in the constructor:
export default class DrunkEffect extends Effect
{
    constructor(props)
    {
        super(
            'DrunkEffect',
            fragmentShader,
            {

            }
        )

        console.log(props)
    }
}

Reference
Another important feature is to let the developers add a reference to our component so that they/them can manipulate it easily.
Let’s try to create a reference and associate it with our <Drunk>.
In Experience.jsx, import useRef from react and create a drunkRef:
import { useRef } from 'react'

export default function Experience()
{
    const drunkRef = useRef()

    // ...
}
Now associate it with the <Drunk> using the ref attribute (you might need to reload):
<Drunk
    ref={ drunkRef }
    frequency={ 2 }
    amplitude={ 0.1 }
/>
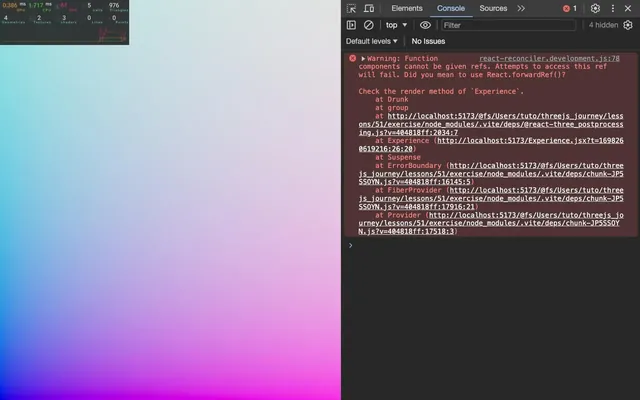
And now, we get an error in the console telling us that “function components” (which is what we did) can’t have ref and that we should use forwardRef from React.
Well, let’s do just that.
In Drunk.jsx, import forwardRef from react:
import { forwardRef } from 'react'We now need to return forwardRef() and pass our whole function component to it.
export default forwardRef(function Drunk(props)
{
    const effect = new DrunkEffect(props)

    return <primitive object={ effect } />
})
Don’t test yet. Because we are using forwardRef, we get access to the ref as the second argument available after props:
export default forwardRef(function Drunk(props, ref)
{
    // ...
})
Finally, we can now forward that ref to the <primitive> with its ref attribute:
return <primitive ref={ ref } object={ effect } />
And now the error is gone and our drunkRef contains a reference to the effect so that developers can manipulate it the way they want.
Getting back the render and make it look greenish
I know that this purple gradient is beautiful, but it’s time to get our render back.
Back to DrunkEffect.jsx, in the fragmentShader, assign the inputColor to outputColor:
void mainImage(const in vec4 inputColor, const in vec2 uv, out vec4 outputColor)
{
    outputColor = inputColor;
}

Great, we have our render back.
Now, let’s make it look more greenish.
First, create a vec4 color, assign the inputColor to it, and then assign that color to the outputColor:
void mainImage(const in vec4 inputColor, const in vec2 uv, out vec4 outputColor)
{
    vec4 color = inputColor;
    outputColor = color;
}
This might sound useless, but remember that we can’t alter the inputColor directly. Creating that color variable from the inputColor duplicates it so that we can manipulate it.
Now, we can multiply the rgb channels of the color by a green color:
void mainImage(const in vec4 inputColor, const in vec2 uv, out vec4 outputColor)
{
    vec4 color = inputColor;
    color.rgb *= vec3(0.8, 1.0, 0.5);

    outputColor = color;
}
We are only manipulating the rgb channels because we don’t want to alter the alpha channel.
And our image now looks greenish.
Wiggle wiggle wiggle
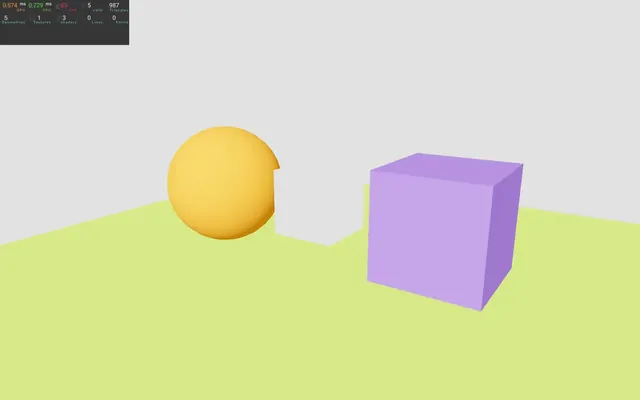
Now comes the best part of the effect. We are going to make the image wiggle.
To do that, we need to mess with the uv coordinates.
As you can see, there is a uv parameter in our mainImage function, but it’s here in case we need to pick pixels on other textures or apply an effect related to the UV coordinates, like the Vignette.
We need to alter the UV coordinates directly, and to do that, we must implement a new function named mainUv.
Add the following mainUv function to the fragmentShader:
const fragmentShader = /* glsl */`
    void mainUv(inout vec2 uv)
    {
    }

    void mainImage(const in vec4 inputColor, const in vec2 uv, out vec4 outputColor)
    {
        // ...
    }
`
This time, the parameter has an inout preceding it.
This means that we can both read and write it.
We are going to use a sin() in order to move the y coordinate of the uv according to the x coordinate (it’ll probably make more sense once you write it):
void mainUv(inout vec2 uv)
{
    uv.y += sin(uv.x);
}

Our effect is a bit too strong.
Right after, we are going to use the attributes we sent to <Drunk>, but for now, let’s multiply uv.x and sin() by arbitrary values:
void mainUv(inout vec2 uv)
{
    uv.y += sin(uv.x * 10.0) * 0.1;
}
Not bad, but we are not done yet.
Use the attributes
It’s time to use those attributes we set on <Drunk>.
We have already forwarded the props to the DrunkEffect and we can retrieve them in the constructor:
export default class DrunkEffect extends Effect
{
    constructor(props)
    {
        console.log(props)

        // ...
    }
}

As always, we can destructure the props to get only what we want:
export default class DrunkEffect extends Effect
{
    constructor({ frequency, amplitude })
    {
        console.log(frequency, amplitude)

        // ...
    }
}
We now need to send them as uniforms and we can do that in the empty object we’ve sent as the third parameter of super().
Be careful though, the format is slightly different than what we are used to and we need to create a Map.
A Map is a mix between an object and an array with helpful methods and properties. We are not going to go into detail, but check the MDN page if you are interested.
Create a uniform property in the empty object and include a Map with the following values:
super(
    'DrunkEffect',
    fragmentShader,
    {
        uniforms: new Map([
            [ 'frequency', { value: frequency } ],
            [ 'amplitude', { value: amplitude } ]
        ])
    }
)
There is actually a different and more official way to create uniforms.
First, import Uniform from three:
import { Uniform } from 'three'Secondly, replace the object containing each uniform by an instance of Uniform:
super(
    'DrunkEffect',
    fragmentShader,
    {
        uniforms: new Map([
            [ 'frequency', new Uniform(frequency) ],
            [ 'amplitude', new Uniform(amplitude) ]
        ])
    }
)
It’s a more decent and standard way to do it and it also enables some methods although we won’t use them.
Thirdly, we can now retrieve those uniforms in the shader:
const fragmentShader = /* glsl */`
    uniform float frequency;
    uniform float amplitude;

    // ...
`
Finally, we use them in the mainUv:
const fragmentShader = /* glsl */`
    uniform float frequency;
    uniform float amplitude;

    void mainUv(inout vec2 uv)
    {
        uv.y += sin(uv.x * frequency) * amplitude;
    }

    // ...
`
Changing the attributes will now change the uniforms.
Let’s make our effect tweakable.
From the terminal, install Leva with npm install leva@0.9.34 (we force the versions to prevent surprises, you can ignore potential vulnerability warnings).
Now, in the Experience.jsx import useControls from leva:
import { useControls } from 'leva'In Experience.jsx, add a useControls call, name it 'Drunk Effect', and set the following tweaks:
export default function Experience()
{
    // ...

    const drunkProps = useControls('Drunk Effect', {
        frequency: { value: 2, min: 1, max: 20 },
        amplitude: { value: 0.1, min: 0, max: 1 }
    })

    // ...
}
Now spread it on the <Drunk> instead of setting each attribute manually:
<Drunk
    ref={ drunkRef }
    { ...drunkProps }
/>
We can now control the effect directly from its attribute, like any other effect.
Blending the color
Up until now, we multiplied the inputColor by a green color, but we can also let the developer decide on a preferred blending.
First, in the fragmentShader, we are going to send the green color directly in the outputColor and keep the alpha from the inputColor:
const fragmentShader = /* glsl */`

    // ...

    void mainImage(const in vec4 inputColor, const in vec2 uv, out vec4 outputColor)
    {
        outputColor = vec4(0.8, 1.0, 0.5, inputColor.a);
    }
`
Everything is now green, but here comes the trick.
Add a blendFunction attribute to the <Drunk> and set it to BlendFunction.DARKEN:
<Drunk
    ref={ drunkRef }
    { ...drunkProps }
    blendFunction={ BlendFunction.DARKEN }
/>
In the DrunkEffect class, retrieve the blendFunction in the destructuring of the constructor:
export default class DrunkEffect extends Effect
{
    constructor({ frequency, amplitude, blendFunction })
    {
        console.log(blendFunction)

        // ...
    }
}
And then, send it to the same object that we used for the uniforms:
super(
    'DrunkEffect',
    fragmentShader,
    {
        blendFunction: blendFunction,
        // ...
    }
)
Because the variable name is the same as the property, we can write it once:
super(
    'DrunkEffect',
    fragmentShader,
    {
        blendFunction,
        // ...
    }
)
The developer implementing the Drunk effect can now choose the blending he/she wants.
But be careful, we didn’t set a default one, resulting in a completely green screen when implementing the effect without configuring a blending (which might look like a bug at first).
In order to fix that, in DrunkEffect.jsx, import BlendFunction from postprocessing :
import { BlendFunction, Effect } from 'postprocessing'Now set the default value of blendFunction to BlendFunction.DARKEN in the constructor parameter:
export default class DrunkEffect extends Effect
{
    constructor({ frequency, amplitude, blendFunction = BlendFunction.DARKEN })
    {
        // ...
    }
}
Omitting the blendFunction attribute will result in DARKEN being used. This way, developers who implement it won’t be surprised to see their render lost to a uniform green.
Animating
To wrap up and to make sure that everybody is made nauseous just by watching our Drunk effect, we are going to animate it.
First, in DrunkEffect, add a time uniform to 0:
super(
    'DrunkEffect',
    fragmentShader,
    {
        blendFunction: blendFunction,
        uniforms: new Map([
            [ 'frequency', new Uniform(frequency) ],
            [ 'amplitude', new Uniform(amplitude) ],
            [ 'time', new Uniform(0) ]
        ])
    }
)
Then, retrieve it in the fragmentShader and add it in the sin():
const fragmentShader = /* glsl */`

    uniform float frequency;
    uniform float amplitude;
    uniform float time;

    void mainUv(inout vec2 uv)
    {
        uv.y += sin(uv.x * frequency + time) * amplitude;
    }

    // ...
`
Nothing is moving because our time stays at 0.
To change the value, we could use the reference that we’ve enabled earlier, but there is an even better way of doing it.
Add an update method to the DrunkEffect class:
export default class DrunkEffect extends Effect
{
    // ...

    update()
    {
        console.log('update')
    }
}
As you can see, the function is being called on each frame automatically.
Here, we can access the uniforms and update the time.
Because we used a Map, we have to access the values with the get method (prepare the puke bag):
export default class DrunkEffect extends Effect
{
    // ...

    update()
    {
        this.uniforms.get('time').value += 0.02
    }
}
We made a classic mistake and didn’t take the frame rate into account.
We can retrieve the elapsed time since the last frame as the third parameter of update().
The two first parameters are the renderer and the inputBuffer. We don’t really care about those, but we have to write them in order to get access to the third parameter:
export default class DrunkEffect extends Effect
{
    // ...

    update(renderer, inputBuffer, deltaTime)
    {
        this.uniforms.get('time').value += deltaTime
    }
}
Right, now we are done with our custom effect.
Going further 01:01:35
This lesson could have been much longer but also quite boring.
Feel free to explore the various effects and take them a step further.
You can also improve the custom effect we’ve created. Here are some areas of improvement:
- Add a uniform to control the color instead of a fixed green and add its corresponding attribute.
- Add an attribute to control the animation speed.
- Add a debug UI to control those attributes.